How to Make Eggs in a Muffin Pan in 10 Easy Steps
If you want a simple way to prepare eggs that’s both convenient and versatile, using a muffin pan might be your best bet. Making eggs in a muffin pan is a great method for portion control and meal prepping. You’ll find it’s easier than you think to get perfectly cooked eggs in uniform portions, whether for a quick breakfast or meal prep.
Before you start, there are a few key steps that will help you avoid common pitfalls and achieve consistent results every time. Following these tips ensures your eggs come out just right, every time you use your muffin pan.
Gather Your Ingredients and Equipment
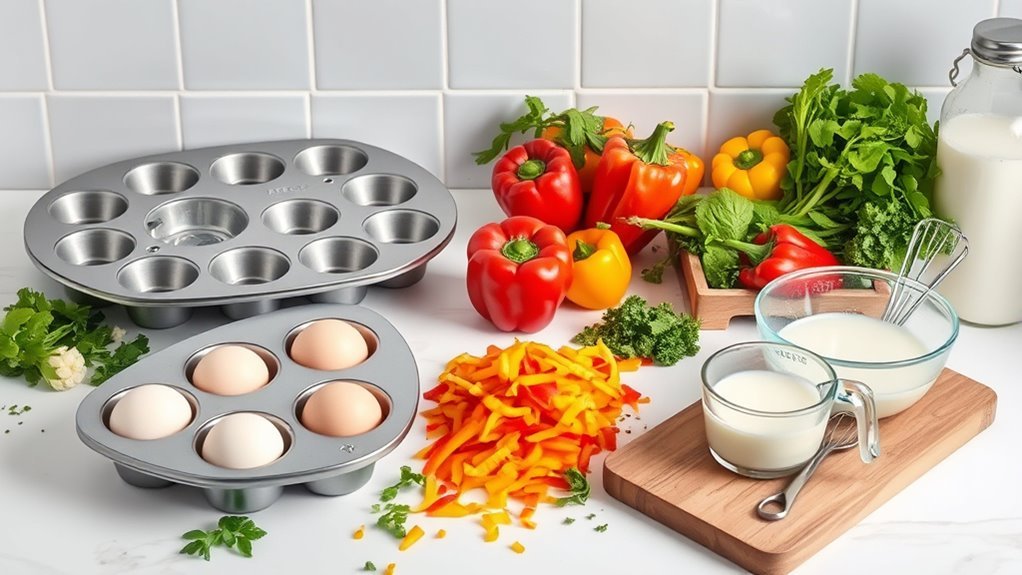
Before you begin, gather 12 large eggs, non-stick cooking spray or butter, and any seasonings or toppings you want to use. To make muffin tin eggs, you’ll need a muffin pan that’s well-greased with non-stick spray or butter to keep the eggs from sticking during baking.
Collect any extras like chopped veggies, cooked bacon, cheese, or herbs to add flavor to your breakfast. Make sure all your ingredients are ready and within reach before you start assembling. Having everything prepared will make the process smoother and quicker.
While you’re getting your muffin pan and ingredients ready, keep in mind you’ll bake the eggs in the oven, but more on that soon. This prep step is key to easy, delicious muffin tin eggs.
Preheat the Oven and Prepare the Muffin Tin

Once you have your ingredients and muffin pan ready, turn your attention to preheating the oven to 350°F (175°C). This temperature guarantees your eggs cook evenly and come out perfectly set.
Preheat your oven to 350°F to ensure perfectly cooked, evenly set eggs every time.
Meanwhile, make sure your muffin tin is clean and dry to avoid any unwanted moisture that could affect cooking.
To prepare your muffin tin:
Lightly coat each cup with nonstick spray to prevent sticking. Place the muffin tin on a stable, oven-safe baking sheet or rack for easy handling. Double-check the oven is fully preheated before placing the muffin tin inside.
Following these steps helps you achieve consistent results and makes cleanup easier after baking your delicious eggs.
Grease Muffin Cups to Prevent Sticking
Although you’ve prepped your muffin tin, you’ll want to grease each cup thoroughly to keep the eggs from adhering. Greasing muffin cups creates a barrier that ensures easy removal and prevents sticking, so your eggs come out clean and intact.
You can lightly spray the cups with nonstick spray or line them with silicone liners for an effortless release.
If you find sticking to be an issue, try using butter or oil instead of spray. These provide a more effective non-stick surface.
Make sure to coat all sides evenly to maximize the effect.
This simple step makes it much easier to lift the eggs out without breaking or tearing, giving you perfectly shaped egg muffins every time.
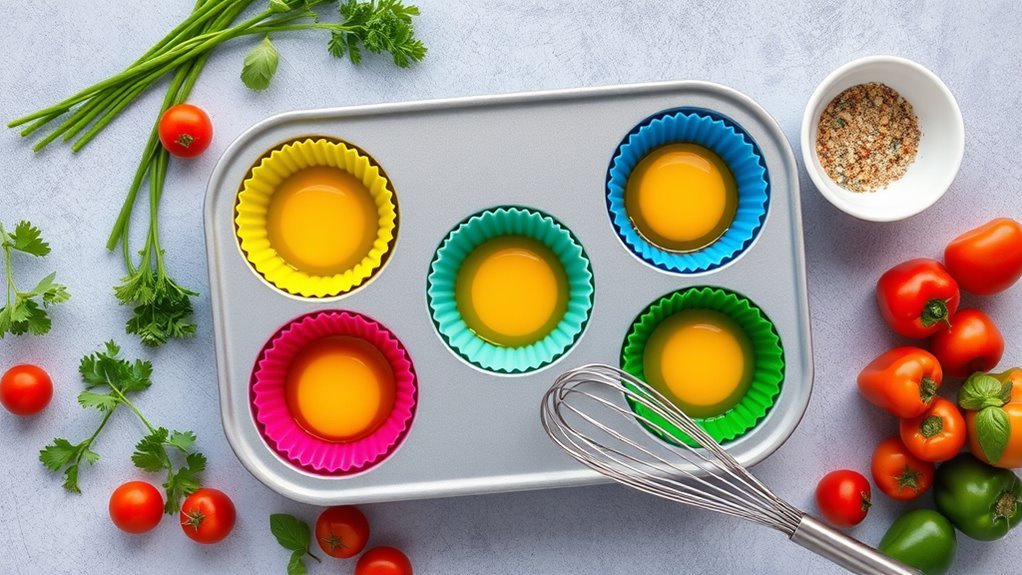
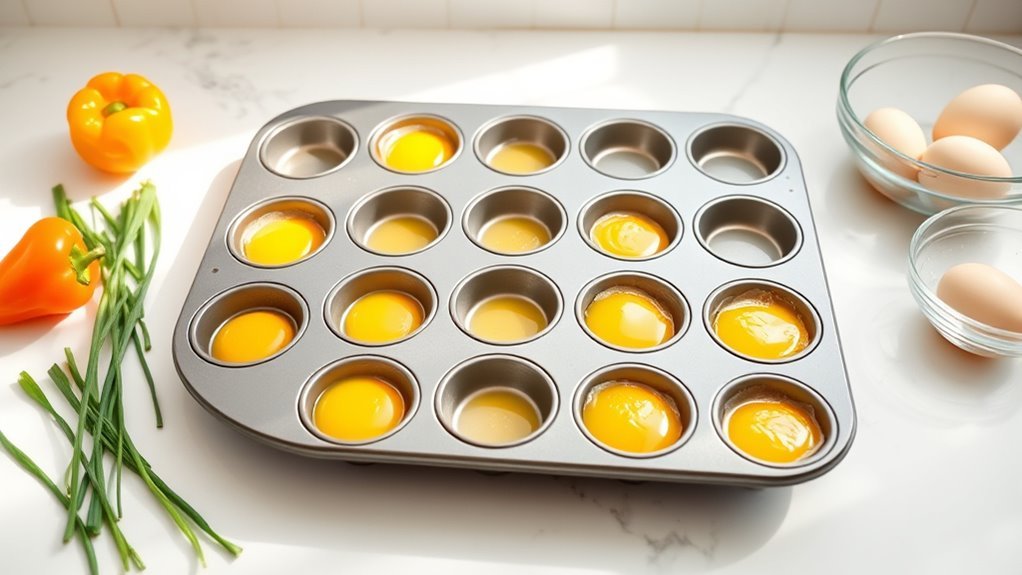
Crack Eggs Into Each Muffin Cup
When you’re ready, carefully crack one large egg into each greased or lined muffin cup, making sure not to break the yolk. Position the eggs evenly spaced in the muffin cups to guarantee they cook uniformly.
To crack eggs cleanly:
Gently tap each egg on the rim of the greased muffin tin or a flat surface.
Use a small knife or spoon to remove any shell fragments before pouring the egg in.
Fill each muffin cup about three-quarters full, allowing room for the egg to expand while baking.
Taking these steps helps prevent sticking and keeps the yolks intact, resulting in perfectly cooked eggs in muffin cups every time.
Season Eggs With Salt, Pepper, and Optional Spices
After cracking the eggs into the muffin cups, sprinkle a pinch of salt and freshly ground black pepper over each one to boost their flavor. This simple seasoning step is key to enhancing the eggs’ natural taste.
Sprinkle salt and freshly ground black pepper on eggs in muffin cups to enhance their natural flavor.
For a more distinctive flavor, you can add optional spices like garlic powder, onion powder, or paprika. Be sure to sprinkle these evenly so every bite is well-seasoned.
Using coarse sea salt or flavored salts can give your eggs a unique twist.
Remember to adjust the amount of salt and spices based on your personal preference or dietary needs. By carefully seasoning the eggs before baking, you set a flavorful foundation that makes your muffin pan eggs delicious and ready for any breakfast.
Add Mix-Ins Like Cheese, Vegetables, or Bacon
To elevate your muffin pan eggs, toss in mix-ins like shredded cheese, sautéed vegetables, or cooked bacon before baking. These additions add flavor and texture, turning simple eggs into a satisfying breakfast you can customize to your liking.
Try these mix-ins for variety:
- Cheese: Use Cheddar, feta, or mozzarella for a rich, melty boost.
- Vegetables: Add chopped bell peppers, spinach, or mushrooms for color and nutrients.
- Bacon: Include cooked bacon pieces to enhance savory taste and protein.
Feel free to mix herbs like chives or parsley for freshness. Customize each muffin cup differently to cater to your taste or dietary needs.
Adding these mix-ins makes your breakfast more exciting and delicious without extra effort.
Bake Eggs According to Desired Doneness
Since everyone prefers their eggs cooked differently, you’ll want to adjust the baking time to get the yolks just right. Set your oven temperature to 350°F and bake eggs for about 10 minutes if you like soft, runny egg yolk.
For semi-solid yolks, aim for 13 to 16 minutes, and if you want firm, fully cooked yolks, bake for 17 to 20 minutes. Keep an eye on the cooking time to achieve your preferred doneness without overcooking.
You can test doneness by inserting a toothpick or small knife into the egg; it should come out clean when the baked eggs are done. Once they reach your target doneness, remove them promptly and let them cool slightly before taking them out of the muffin tin.
Check Eggs for Doneness and Adjust Timing if Needed
Although baking times provide a helpful guideline, you’ll want to check the eggs for doneness by inserting a toothpick or knife into the center. If it comes out clean, your oven baked eggs are ready.
Since bake time varies with yolk preference, use this doneness test to nail your perfect texture.
If the eggs aren’t done, return them to the oven and extend cooking time by 1-2 minutes, checking frequently. Keep these tips in mind:
- For runny yolks, aim for 10-12 minutes bake time
- Semi-solid yolks usually take 14-17 minutes
- Fully cooked yolks require 17-20 minutes
Adjust the cooking time as needed to avoid overcooking, which leads to rubbery eggs. Regularly check eggs to master doneness every time.
Cool Eggs Before Removing From Muffin Tin
Once you’ve confirmed your eggs are perfectly cooked, give them some time to cool in the muffin tin. Cooling your eggs for at least five minutes helps prevent burns and makes easy removal possible.
As the eggs cool, they develop a firm texture that reduces the chance of breaking or crumbling when you lift them out. To aid in easy removal, gently run a butter knife or small spatula around each egg’s edges during the cooling process.
Patience during cooling guarantees your eggs will keep their shape and look great on the plate. When they’re cool enough to handle, carefully invert or lift them with a spoon or tongs, transferring them safely without damage or risk of burns.
Serve Immediately or Store for Later Use
After your eggs have cooled and firmed up, you can serve them right away to enjoy their fresh, hot flavor, or store them properly for later meals.
Baked eggs make a great meal prep option since you can easily reheat them.
To store your eggs: Place cooled baked eggs in an airtight container and refrigerate for up to 5 days.
For longer storage, freeze them on a baking sheet, then transfer to a freezer-safe container for up to 2 months.
Reheat refrigerated eggs in the microwave for 30-45 seconds, adding a splash of water or covering with a damp paper towel to keep them moist.
Enjoy your eggs immediately after reheating for the best taste and texture!
Frequently Asked Questions
How to Make Eggs in a Muffin Top Pan?
You crack eggs directly into a greased muffin top pan, season them, and bake at 350°F. Adjust baking time for yolk preference.
Once done, gently loosen and remove eggs, then serve or store as needed.
How to Make Eggs in a Pan Step by Step?
You’ll crack eggs into a greased pan, season them, then gently cook over medium heat. Watch as whites solidify while yolks stay runny or firm—flip or cover to finish.
Serve warm and enjoy!
What Are 10 Ways to Cook Eggs?
You can cook eggs boiled, scrambled, fried, poached, baked, steamed, microwaved, in an omelette, as deviled eggs, or make egg salad.
Each method offers different textures and flavors for you to enjoy.
What Is the 5 5 5 Rule for Eggs?
Think of the 5-5-5 rule as a golden sun rising—5 minutes for soft, like dawn’s gentle light; 5 more for medium, the sun climbing higher; then 5 for hard, the midday blaze.
You cook eggs to perfect warmth.
Conclusion
Now that you’ve mastered making eggs in a muffin pan, you’ll see how simple yet satisfying this method truly is. It’s not just about cooking eggs—it’s about creating a quick, customizable breakfast that fits your busy life.
Don’t underestimate the joy of perfectly baked eggs, each one a little victory you can savor. Give it a try, and you might find this easy recipe becoming your new favorite morning ritual.
Making eggs in a muffin pan is an effortless way to prepare a nutritious meal. With this method, you can enjoy perfectly cooked eggs every time, making breakfast both delicious and convenient.