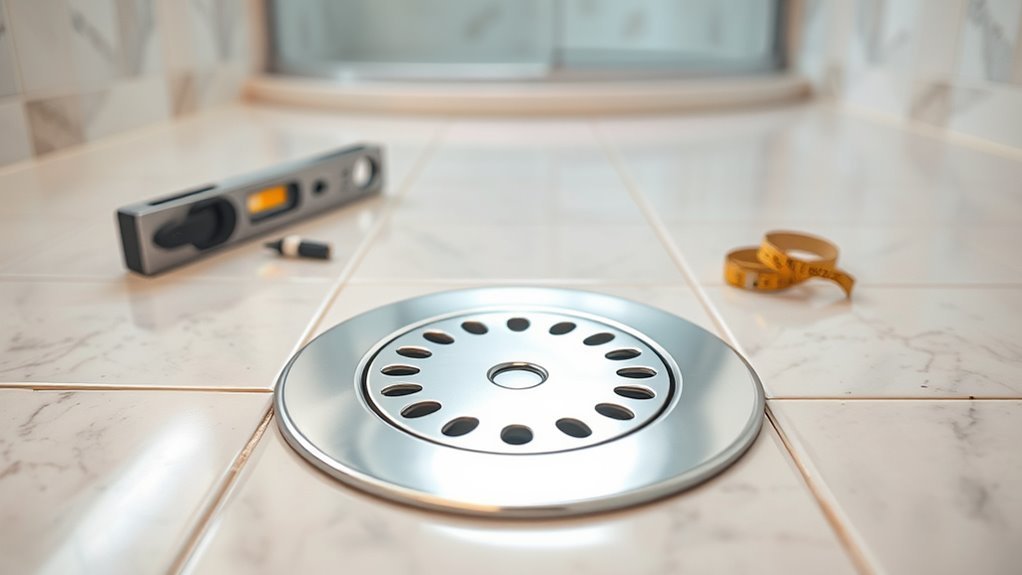
How to Install a Shower Pan Drain in 3 Easy Steps
You might think installing a shower pan drain is too complex to handle yourself, but it’s actually straightforward if you follow the right steps. Installing a shower pan drain properly is essential for a leak-free and durable shower base. By breaking the process down into three manageable parts, you can avoid common pitfalls and guarantee a proper fit.
Once you understand how to secure the drain, create the mortar bed, and apply the waterproof membrane, you’ll be well on your way to a successful shower pan installation. These simple steps ensure your shower base is both functional and long-lasting. With a little patience and attention to detail, you can complete the job confidently and efficiently.
Secure and Connect the Drain Assembly
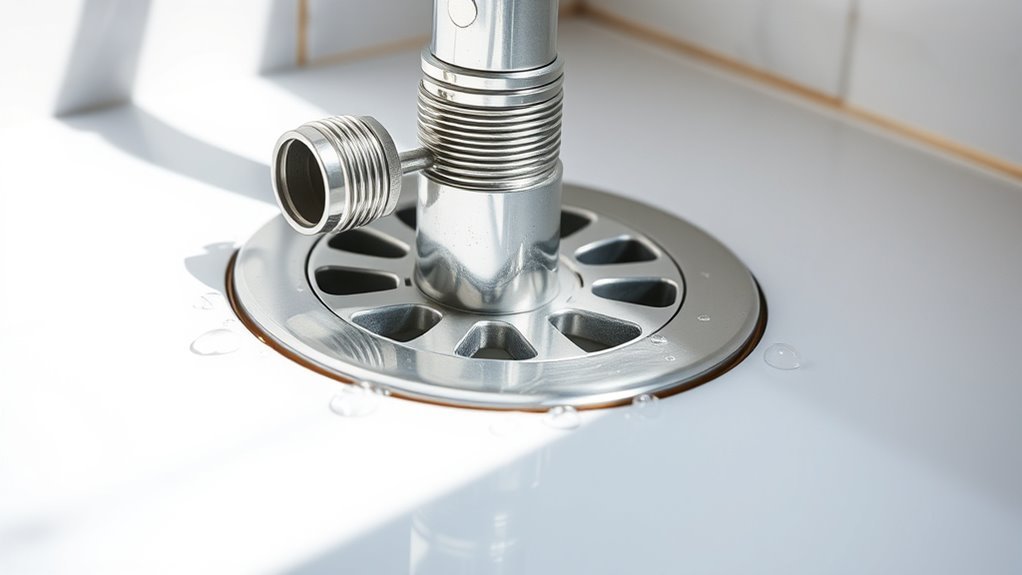
Before you insert the drain flange, place the rubber gasket over the drain pipe with the beveled side facing up. This guarantees a waterproof and secure sealing when you install the drain assembly.
Next, insert the drain flange into the shower pan’s opening, pressing firmly to create a tight connection.
Underneath the shower pan, thread the friction washer and rubber sealing washer onto the drain flange.
Then, screw the locking nut onto the flange and tighten it snugly using adjustable pliers. Be careful not to overtighten. This step guarantees the drain assembly stays firmly in place and prevents leaks.
Finally, secure the drain cover or strainer onto the flange by snapping or screwing it into place, completing a clean installation with a reliable, sealed connection.
Create the Mortar Bed and Embed the Drain Flange
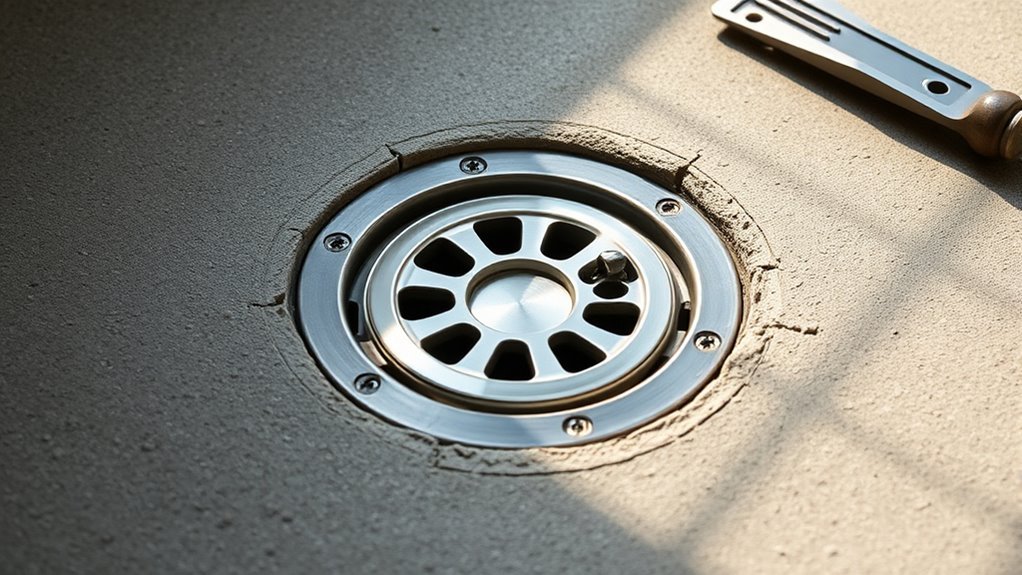
Once you mix the drypack mortar or thinset to the right consistency, spread it evenly over the subfloor, creating a slope of about 1/4 inch per foot toward the drain opening. This sloped mortar bed ensures proper drainage for your shower pan.
Next, press the drain flange firmly into the mortar bed. Make sure the drain flange height aligns flush with the finished shower pan surface. It’s vital to keep the flange’s top edge level and properly positioned during this shower drain installation step.
After embedding the drain flange, allow the mortar to cure fully, following the manufacturer’s recommended curing mortar time, usually 24 to 48 hours. Proper mortar consistency and correct drain flange placement are key to a secure and effective install drain process.
Install the Waterproof Membrane and Finish Tiling
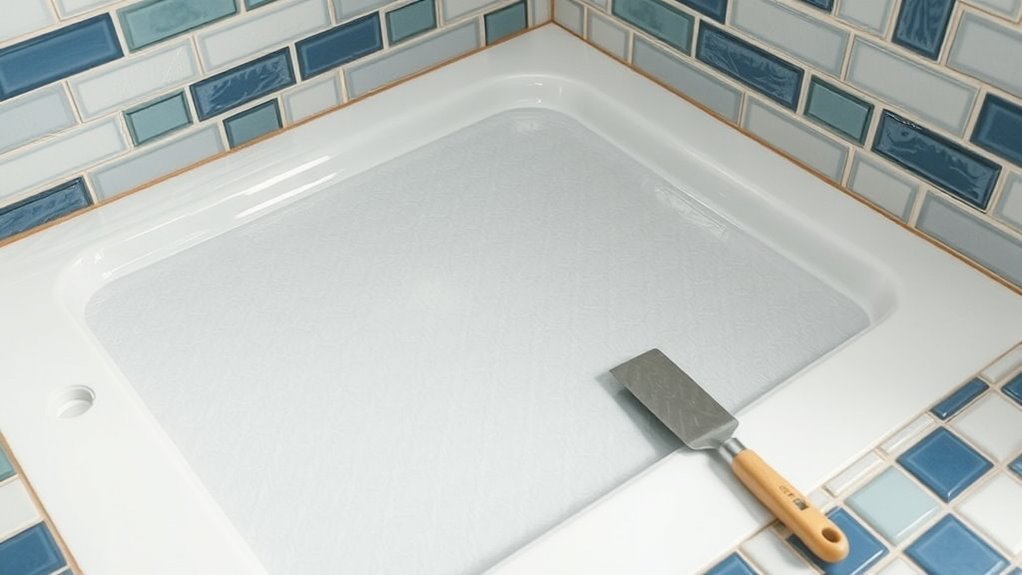
Although the mortar bed provides a solid base, you need to install a waterproof membrane over the sloped shower floor and extend it up the walls at least six inches to protect against water damage.
Start by making a precise cut around the drain flange, then adhere the membrane tightly with waterproof adhesive or sealant.
Next, overlap the membrane onto the walls to create a continuous barrier. Secure all seams with waterproofing tape or sealant to prevent leaks.
Finally, apply a layer of thinset mortar over the membrane before tiling to ensure a stable surface.
Follow these steps:
- Precisely cut and attach membrane around drain flange using sealant or adhesive.
- Overlap membrane onto walls and seal seams with waterproofing tape.
- Apply thinset mortar and proceed with tiling.
Frequently Asked Questions
How Do You Attach a Shower Drain to a Pan?
You attach a shower drain to a pan by sliding the gasket and washer over the drain pipe, applying sealant under the flange, inserting it into the pan, then tightening the locking nut firmly underneath to secure it.
First, ensure the gasket and washer are properly positioned on the drain pipe. Apply a bead of sealant under the flange to prevent leaks. Next, insert the drain assembly into the pan’s hole carefully.
Finally, from underneath the pan, thread the locking nut onto the drain pipe and tighten it securely. This will hold the drain firmly in place and create a watertight seal. Double-check for any gaps or looseness before proceeding.
What Are Common Shower Pan Installation Mistakes?
Don’t let your shower pan turn into a leaky sieve. You’ll mess up by mismeasuring drain height, skipping proper sealing, ignoring level support, and failing to test for leaks before tiling—these mistakes invite water damage and mold.
Is It Better to Use Plumbers Putty or Silicone on a Shower Drain?
You should use silicone on a shower drain because it’s more durable, flexible, and waterproof than plumber’s putty. Silicone lasts longer, adheres better, and prevents leaks, especially in wet, tiled shower areas.
Its flexibility allows it to maintain a good seal even when there is slight movement or settling of the drain. Plumber’s putty can dry out and crack over time, which may lead to leaks.
For these reasons, silicone is generally the better choice for sealing shower drains.
Can You Put a Shower Pan Directly on Plywood?
Imagine Sarah’s bathroom remodel: yes, you can put a shower pan directly on plywood if it’s sturdy, well-secured, and waterproofed.
Just guarantee proper slope and consider adding a mortar bed for added durability and leak prevention.
Conclusion
Now that you’ve nailed securing the drain assembly, creating the perfect mortar bed, and waterproofing like a pro, your shower pan drain is ready to handle more water than a monsoon!
With these simple steps, you’ve transformed a tricky task into a breeze. Just take your time, follow the process closely, and you’ll enjoy a leak-free, sturdy shower base that lasts for years.
By installing the shower pan drain properly, you ensure efficient drainage and prevent costly water damage. You’ve got this—happy tiling!